the painting everyone asks me about
couldn’t find the right art? same. so I painted my own.
MADE BY ME
11/14/20252 min read
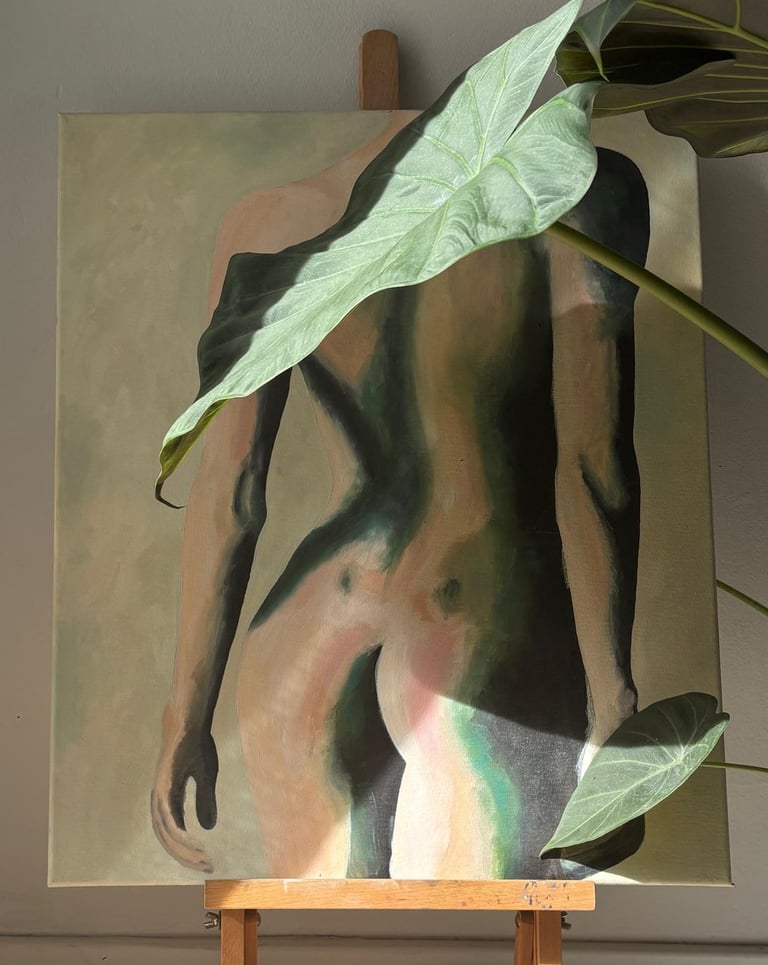

Every time someone comes over and sees this painting, they go:
“Wait… did you paint this?”
Not because it's some masterpice, but because it fits my space perfectly, and that makes it stand out.
The truth is, painting your own canvas isn’t about being artistic. It’s about creating something that fits your home better than anything you could buy.
And honestly? It’s way easier (and way more fun) than it looks.
the idea:
You don’t need a perfect sketch, you just need an idea (and that’s exactly what Pinterest is for).
Scroll a bit, save what catches your eye, and then adapt it to what could feel right for your space. It's about adapting the vibe your are after to your own colour palette and your own home.
the prep:
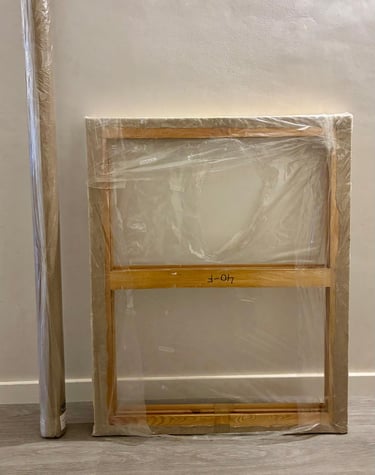
Blank canvases can be pricey, specially if they are large, so I didn’t buy one.
Instead, I found three used canvas frames left on the street one (where I live, people leave things they don’t need anymore outside their homes on Monday evenings for the city council to collect). The original canvases were ripped, but the fames? Perfect!
So I bought a roll of treated canvas fabric, wrapped it around one of the frames, and stapled it tightly with a staple gun.
Then I set the vibe: good natural light, a quiet playlist, prepared a coffee. And let the imagination start...!

what I used (and what it cost):
Canvas frame (found + rebuilt): 0 €
Treated canvas fabric: 55 € (but I only used about 1/10 → ~5.50 €)
Staple gun: 10.99 € (and I’ll use it again for other projects)
Oil paints in neutral tones: 17.95 € (still have most of it left)
Brushes in a few sizes: 3.95 €
A bowl or palette to mix tones: 0 € (used what I already had)
Total for this painting: around 20–25 € for a piece that fits my home perfectly.
the painting:
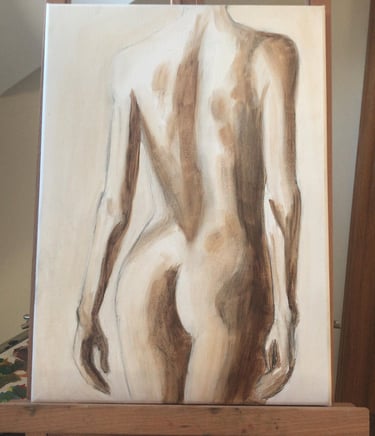
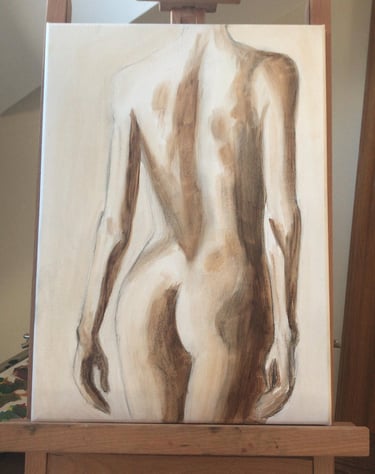
I paint with oils, but the process works fine with any medium.
Sketch the silhouette loosely.
Nothing detailed, just the flow of the shape.Use browns to map out the shading.
This step is key! It keeps you from losing the form once you add colour.Start layering your tones: beige, pink, sage, soft cream.
Let each layer dry a little before adding more. That’s how you keep the texture alive instead of blending everything into mud.
And please don’t chase perfection. Visible brushstrokes make it interesting.